Live Transcoding allows you to convert your live source stream into multiple output qualities (ABR) for adaptive playback across devices. This article walks through how to enable Live Transcoding from the CDN Dashboard, and explains the Try Activate button you’ll encounter during setup.
Prerequisites
- A minimum of $10 credit on your CDN account is required to enable Live Transcoding.
- Live Transcoding is billed on an hourly basis by default.
- If your stream runs 24×7, switching to monthly billing is recommended — contact your Account Manager to enable this.
- By default, Live Transcoding uses the Shared Pool for LTC (Live Transcoding Core) allocation.
- If you require guaranteed, reserved capacity, you can request a Dedicated Pool by contacting our Support team.
Steps to Enable Live Transcoding
Step 1: Open the stream you want to transcode
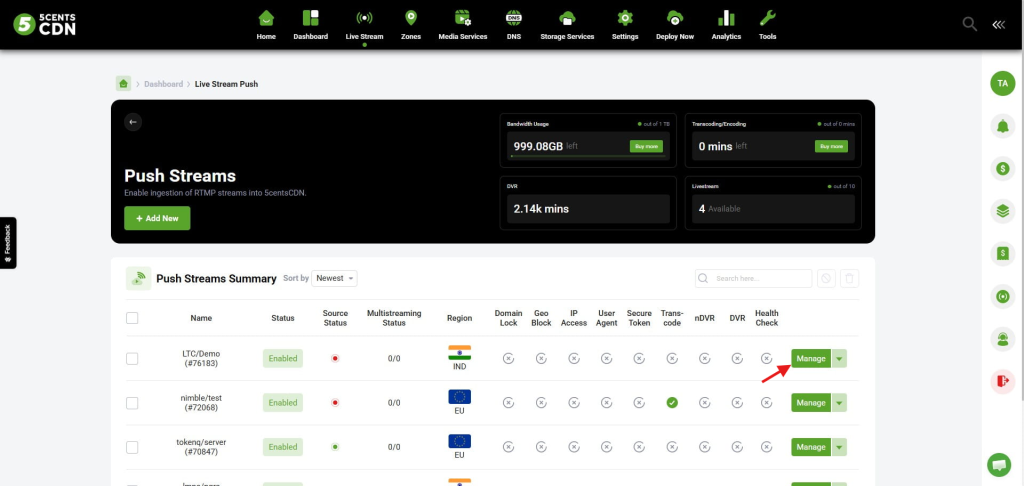
From the CDN Dashboard, go to Live Stream > Live Stream Push (or Pull). Locate the corresponding stream in the Push Streams Summary list and click the Manage button next to it.
Step 2: Go to Live Transcoding
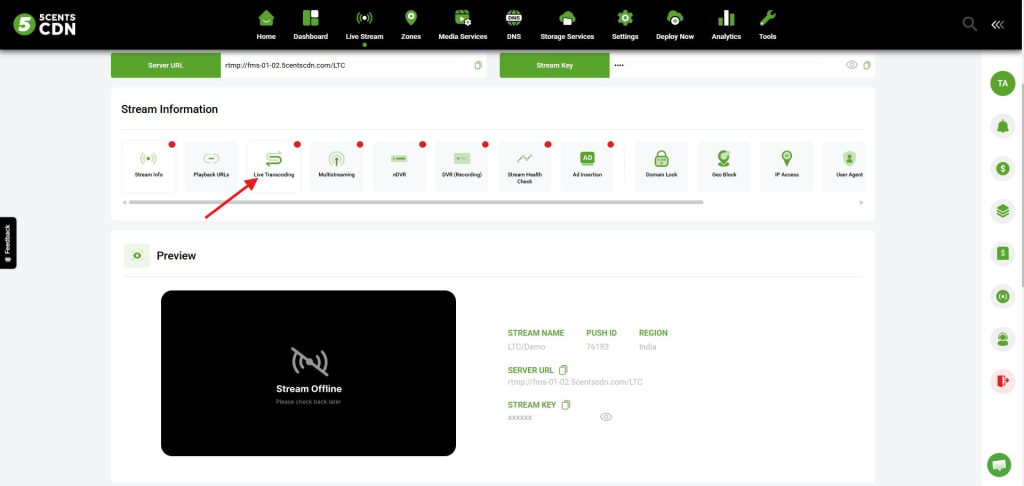
In the stream’s Stream Information section, click on the Live Transcoding tab.
Step 3: Select the Live Transcoding Core (LTC)
Click the Choose LTC dropdown and select the required core based on your stream’s bitrate/quality needs (e.g., LT1C @ $0.06/hr, LT2C @ $0.12/hr, and so on — pricing scales with the core level).
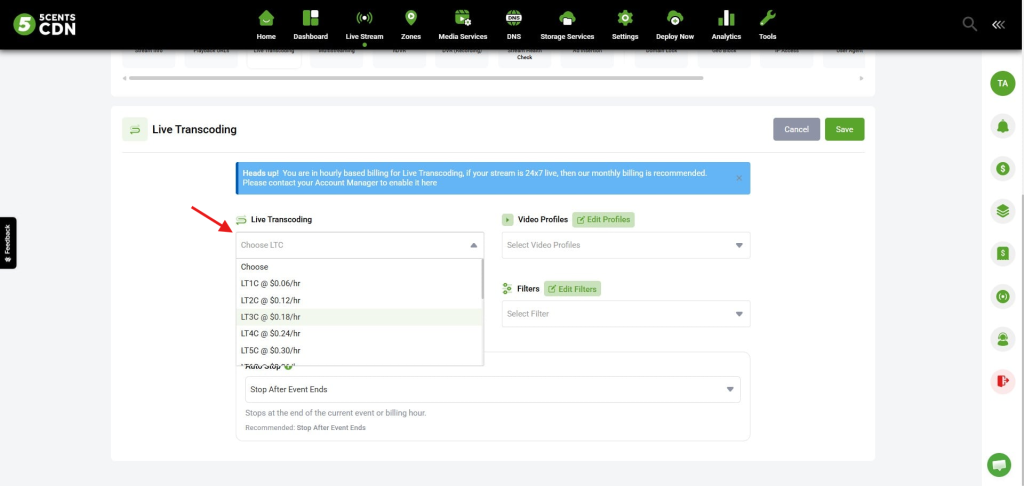
A banner will remind you that billing is hourly by default, and that monthly billing is recommended for 24×7 streams.
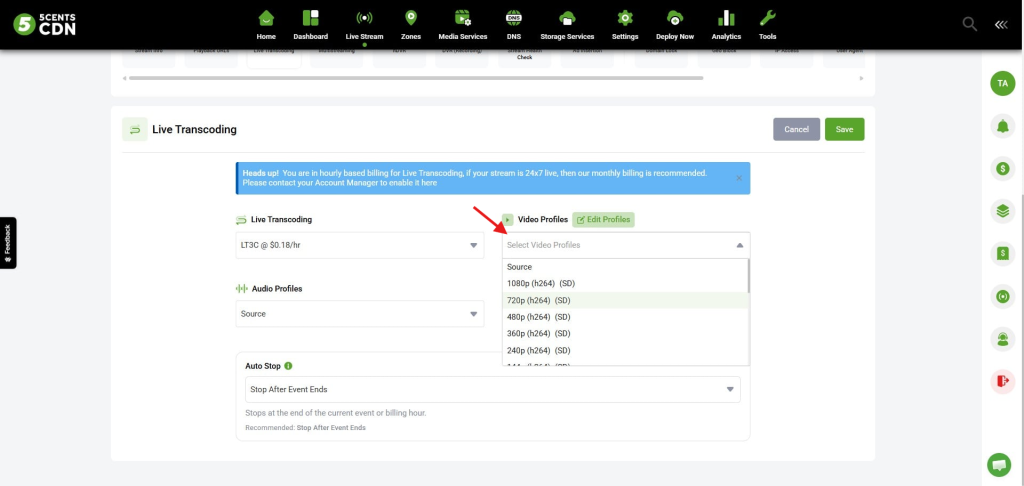
Step 4: Select Video Profiles
Click Select Video Profiles and choose the output resolution(s) required (e.g., Source, 1080p, 720p, 480p, 360p, 240p). You can select multiple profiles to create a multi-bitrate (ABR) output.
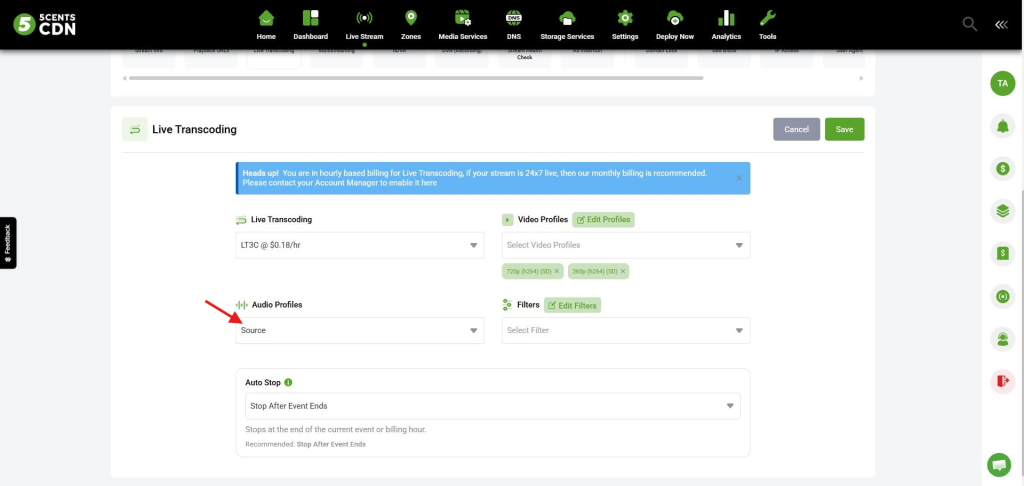
Step 5: Select Audio Profiles (and Filters, if needed)
Choose the required Audio Profiles (default: Source). Optionally, under Filters, click Edit Filters to apply a filter if needed (e.g., logo overlay, flip/rotate).
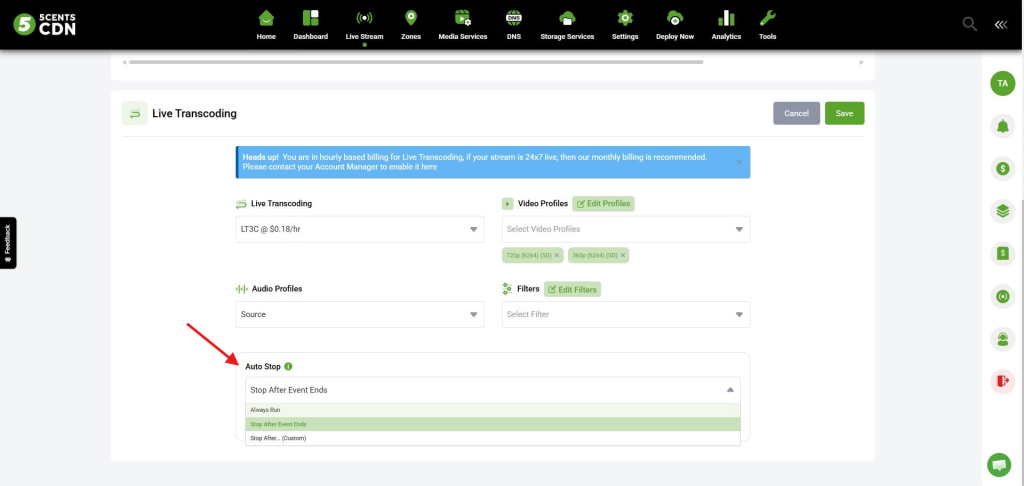
Step 6: Configure Auto Stop
Set the Auto Stop behavior based on your use case:
- Always Run – Transcoding continues indefinitely until manually stopped.
- Stop After Event Ends – Stops automatically at the end of the current event/stream. (Recommended default)
- Stop After… (Custom) – Define a custom stop duration.
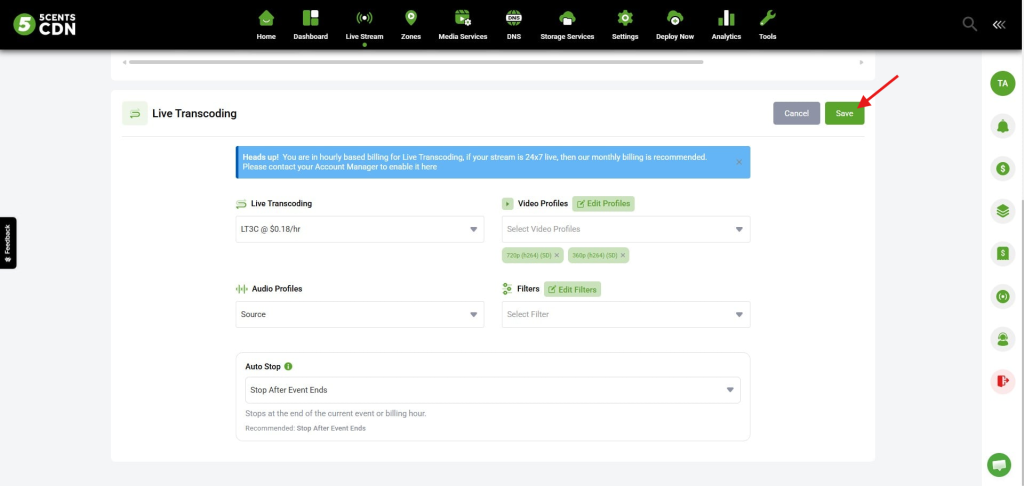
Step 7: Save
Click Save to apply the configuration.
Step 8: Click “Try Activate”
Once saved, a Try Activate button appears. Since Live Transcoding defaults to the Shared Pool, the system needs to verify that the required LTC is actually available before starting the transcoder.
Click Try Activate to start:
- If the LTC is available → transcoding starts, and a success message is shown.
- If the LTC is not available (Shared Pool full) → a warning message appears indicating there isn’t enough space for the selected LTC.
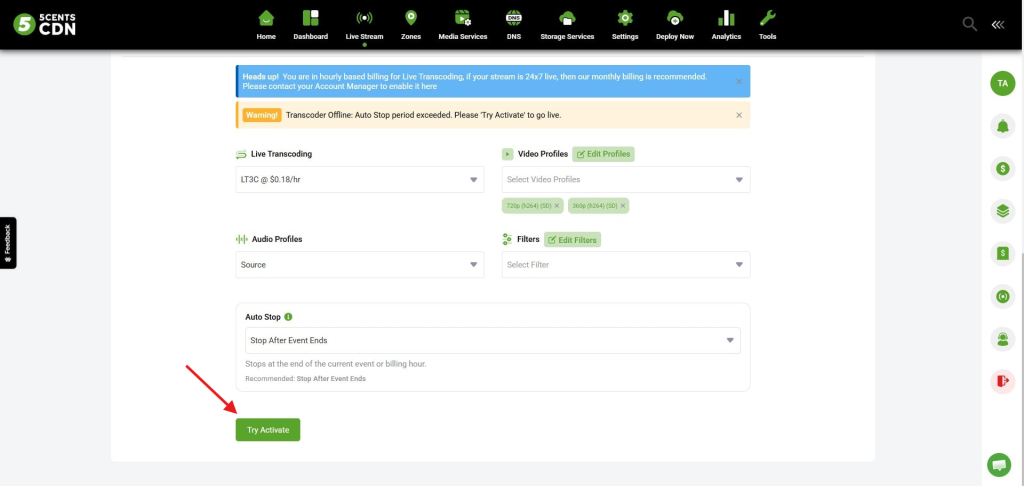
What Is the “Try Activate” Button For?
The Try Activate button is used to start (or restart) the transcoder once your settings are saved. It exists because, on the Shared Pool, LTC capacity is shared across all clients — so availability isn’t guaranteed at save time and must be actively checked/claimed.
You’ll also see this button prompted in other scenarios:
- Transcoder Offline (Auto Stop triggered): If the Auto Stop period has ended (e.g., after “Stop After Event Ends”), the transcoder goes offline and displays: “Transcoder Offline: Auto Stop period exceeded. Please ‘Try Activate’ to go live.” Clicking Try Activate resumes transcoding.
If Try Activate fails due to Shared Pool availability:
Wait until the Shared Pool frees up and try again, or
Select a lower LTC and click Try Activate again, or
Contact Support to set up a Dedicated Pool, which reserves guaranteed LTC capacity so you never have to wait or worry about availability.