IP Filters are rules you can apply to your records that if a user meets the requirement(s) of the filter, they will be answered with that record. Otherwise, they will be answered with the World/Default. Filters can be created for: regions, countries, cities, ASN (Autonomous System Network) of the resolving name server, /24 IPv4 EDNS client subnet, and /120 IPv6 EDNS client subnet.
The IP Filter is Available for A, AAAA, CNAME, and ANAME records.
The IP Filter should be disabled for the default rule. You will receive an error message if you try to set up a specific region, country, city, or ASN (Autonomous System Network). As a result, the default rule is for worldwide access.
To configure IP Filter in Traffic Director, follow the steps
- Login to 5centsCDN control panel.
- Go to Traffic Director.
- Click the Manage button of your domain.
- On the redirected page, you can see all the records. Click the green plus button to create a new record.
- We can enable IP Filter for A, AAAA, CNAME, and ANAME records. So select any one of these from the list.
- Provide the following details in the redirected window.
- Name: Provide the hostname(For example www).
- TTL: Specify the corresponding TTL value. Time to live (TTL) dictates how long your records stay cached. For example, for how long will your A record is cached before retrieving a new copy of the record from DNS servers
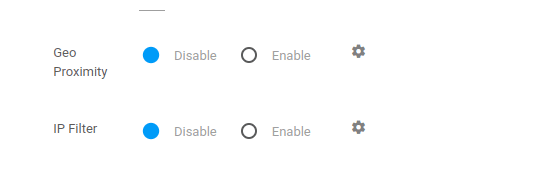
- Geo Proximity: Geo Proximity should be disabled for this record.
- IP Filter: The IP Filter should be disabled for the default rule. The default rule is for worldwide access. We can configure the IP Filter in the next rule.
-
- Rule Mode: choose the appropriate rule mode.
- Standard – In standard rule mode, you can point your domain to an IP/Hostname. This method does not allow failure switching between servers. Specify all the IP/Hostname in the field and you can enable or disable them manually.
- Failover– This rule method allows you to add multiple servers’ IP addresses or hostnames. The traffic director will check the status of your server periodically using Health Check and switch to another server if the primary goes offline based on the failover mode. The failover modes are explained below.
- Normal – Failover will attempt to use the lowest IP address/Hostname in the queue. This means if the lowest IP/Hostname becomes available again then it will switch to the lowest IP/hostname address.
- Off- Failover will turn off after the first and only event has occurred. If the primary IP/hostname becomes available again, it won’t switch back. You have to resave the settings again to use the primary IP/Host
- One Way- Failover will only move further down the queue to the higher IP/Hostname. If the lower one becomes available. It won’t use it. You have to resave the settings again to use the primary IP/Hostname.
- Round Robin with Failover- When using the Standard and Failover methods, the response will be received by a specific IP address or Hostname at a time. Round Robin with failover mode acts as a load balancer and provides random responses from active IP addresses or Hostname. Ensure you have enabled Health Check for the IP/Hostname.
- Rule Mode: choose the appropriate rule mode.
- Click the CREATE button.
The DNS record is created. You can check the record and can see a rule created inside the record. It looks like this

The rule shows IP Filter: World(Default), Which means the rule is created for worldwide access. The users will be directed to the specified IP/Hostname in this rule.
Now you can create another rule for the same record to direct traffic for specific regions, countries, cities, ASN (Autonomous System Network) of the resolving name server, /24 IPv4 EDNS client subnet, and /120 IPv6 EDNS client subnet.
Please follow the steps to create another rule for the record,
- Click the record that was recently created.
- Click the plus button in the record to create another rule.
- Enable IP Filter and click the settings icon.
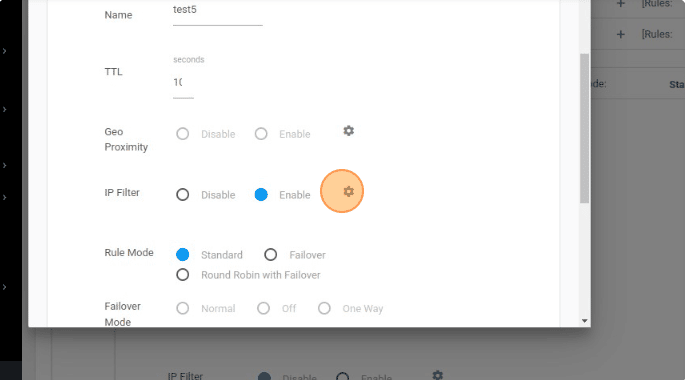
- Configure the Filter settings. The options are explained below
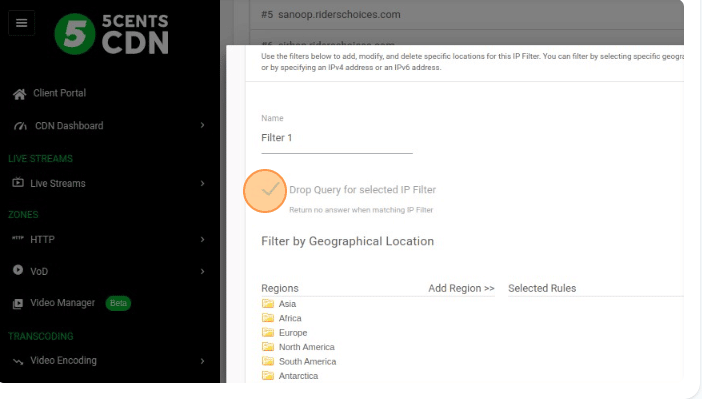
- Name: Create a unique, easy-to-identify name for your filter.
- Drop Query for selected IP Filter: Enable this option if you want to return no answer when matching IP Filter.
-
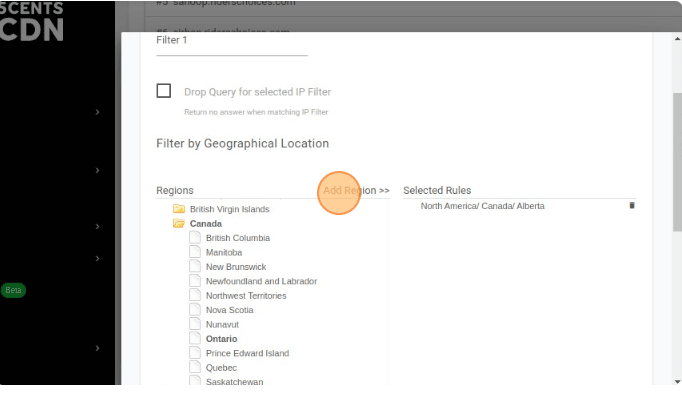
- Filter by Geographical Location: Filtering by location lets you choose a region, state, or city for your rule. You can select the regions and click the Add Region.
-
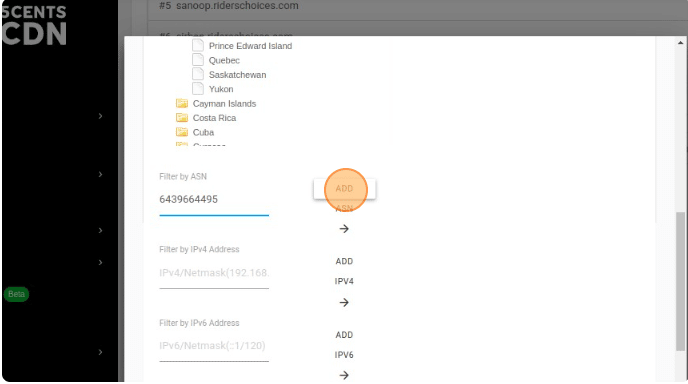
- Filter by ASN: This option allows you to create a rule based on an ASN. Enter the ASN you wish to filter and then click the ASN button. Repeat until you have entered all ASNs that apply to this specific rule.
-
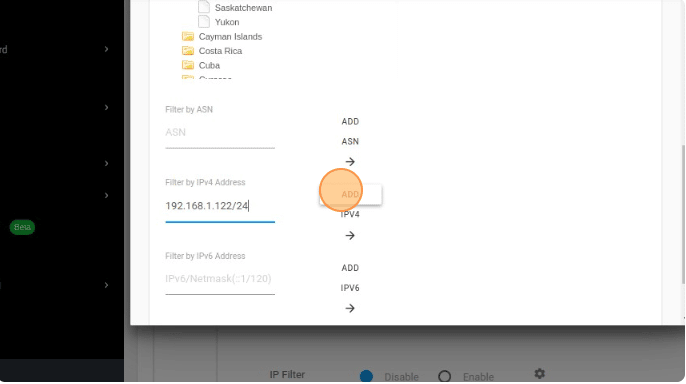
- Filter by IPv4 Address: Enter the IP or subnet (in CIDR notation) v4/netmask if you are filtering by IP and then click on the IPV4 button to add the IP to Rules.
-
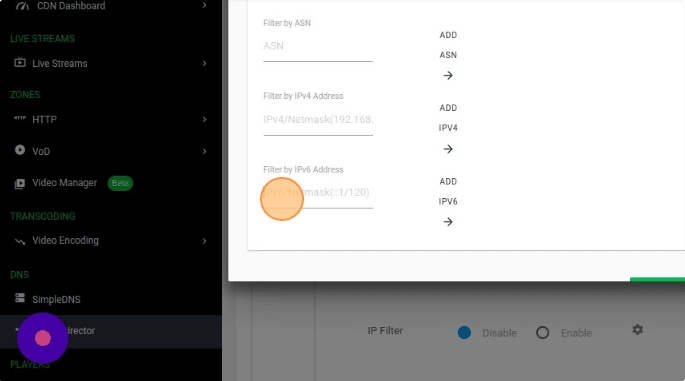
- Filter by IPv6 Address: Enter the IPv6/netmask if you are filtering by IP and then click on the IPV6 button to add the IP to Rules.
-
- Click the SET button.
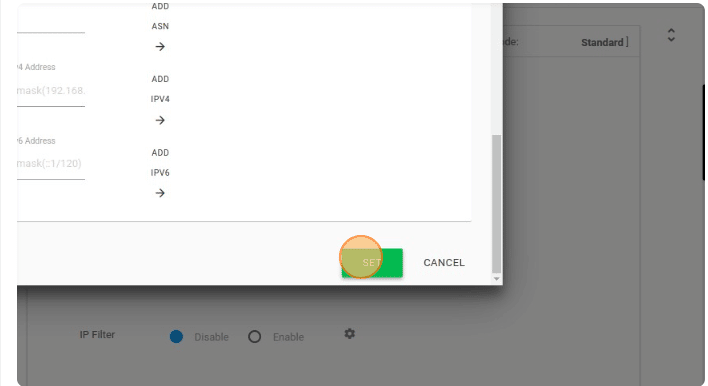
We have configured the IP Filter, now you can select the appropriate Rule Mode and specify the IP address/Hostname that you want to direct traffic for the filter option. The answer will be delivered from the specified IP/Hostname If the filter options are matched.
