This article explains the steps to upload files to Open Stack Swift using curl. Please follow the steps.
- The first step is to download the OpenStack RC File from the console.
-
- Login to 5centsCDN console.
- Go to Zones and select HTTP or VoD push zone.
- Click the Manage button of your push zone.
- On the redirected page, Click FTP / OpenStack Details.
- Select OPENSTACK option.
- Here you can download the OpenStack RC File v3. Simply click the download option.
2. The second step is, you need to get a token that can be used instead of the user name and password. Authentication is done through keystone. You can follow the steps to generate the token.
The token is valid for 24 hrs time. you can use the token instead of Username and Password.
- You can use the below-mentioned script to generate the token.
- Create a file in your system. Open Terminal and execute the command.
$nano token.sh - Paste the token generation script to the file. A sample script is attached below
- Create a file in your system. Open Terminal and execute the command.
#!/bin/sh

export OS_PROJECT_DOMAIN_NAME=
export OS_USER_DOMAIN_NAME=
export OS_PROJECT_NAME=
export OS_USERNAME=
export OS_PASSWORD=
export OS_AUTH_URL=http://controller.5centscdn.com/v3/

TMPFILE=`mktemp`
chmod 600 ${TMPFILE}

JSONFILE=`mktemp`
chmod 600 ${JSONFILE}

cat >${JSONFILE} <
{
  "auth": {
    "identity": {
       "methods": ["password"],
          "password": {
             "user": {
                "domain": {"name": "${OS_USER_DOMAIN_NAME}"},
                   "name": "${OS_USERNAME}",
                   "password": "${OS_PASSWORD}"
             }
          }
       },
       "scope": {
          "project": {
             "domain": {"name": "${OS_PROJECT_DOMAIN_NAME}"},
                "name": "${OS_PROJECT_NAME}"
          }
       }
   }
}
EOF

curl -si
  -H "Content-Type: application/json"
  -o ${TMPFILE}
  -d @${JSONFILE}
${OS_AUTH_URL}/auth/tokens 2>/dev/null

echo
cat ${TMPFILE} | grep 'X-Subject-Token:'

echo
tail -1 ${TMPFILE} | json_pp

rm -f ${TMPFILE} ${JSONFILE}
-
- In Step 1, we have already downloaded the OpenStack RC File v3. You can replace the credentials in the above script with the credentials listed in the OpenStack RC File v3. You have to replace the following credential in the above code.
export OS_PROJECT_DOMAIN_NAME=
export OS_USER_DOMAIN_NAME= export OS_PROJECT_NAME= export OS_USERNAME= export OS_PASSWORD= export OS_AUTH_URL=http://controller.5centscdn.com/v3/ - Now you can save the file and exit from the editor.
- In Step 1, we have already downloaded the OpenStack RC File v3. You can replace the credentials in the above script with the credentials listed in the OpenStack RC File v3. You have to replace the following credential in the above code.
- Run the script to get the Token and storage URL
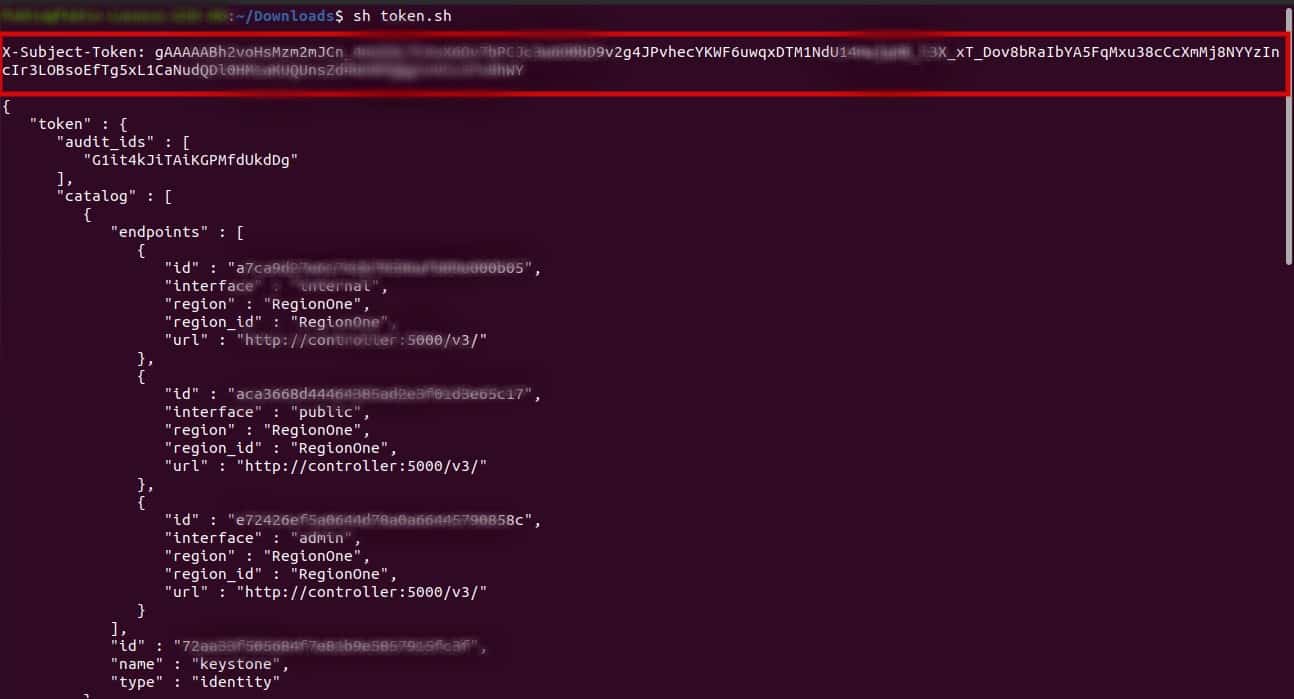
$sh token.sh
- Once the script is executed, you will get the token in this section “X-Subject-Token:”. Also, you can find the storage URL from the output. a sample output image is attacked below.
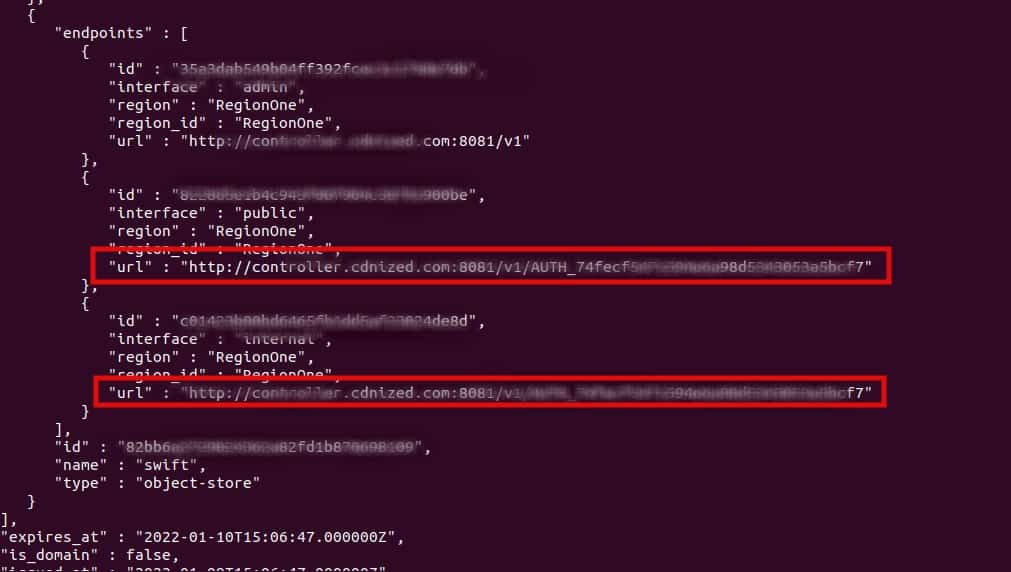
3. The token and storage URL generated, now you can execute operations like create a container, Upload files, list containers or files using curl
-> How to create a container using curl?
curl -i -X PUT -H "X-Auth-Token: " /mycontainer
Here, you can replace and
-> How to upload/Download an object or file using curl?
curl -i -T myobject -X PUT -H "X-Auth-Token: " /mycontainer/myobject
curl -s -S -X GET -H "X-Auth-Token: " /mycontainer/myobject -O
-> How to list containers in an account?
curl -s -S -X GET -H "X-Auth-Token: "
-> How to list objects in a container?
curl -s -S -X GET -H "X-Auth-Token: " /mycontainer
-> How to delete a container?
curl -s -S -X DELETE -H "X-Auth-Token: " /mycontainer
-> How to delete an object?
curl -s -S -X DELETE -H "X-Auth-Token: " /mycontainer/myobject
Pingback: วิเคราะห์ ผลบอล คืออะไร ?
Pingback: หาโรงงานจีน
Pingback: rich89bet
Pingback: เครื่องทําสเลอปี้
Pingback: ayurveda retreat
Pingback: check out this site
Pingback: EV Charger