This guide walks you through the step-by-step process of creating encoding profiles for video streaming and transcoding on the 5centsCDN platform.
Getting Started
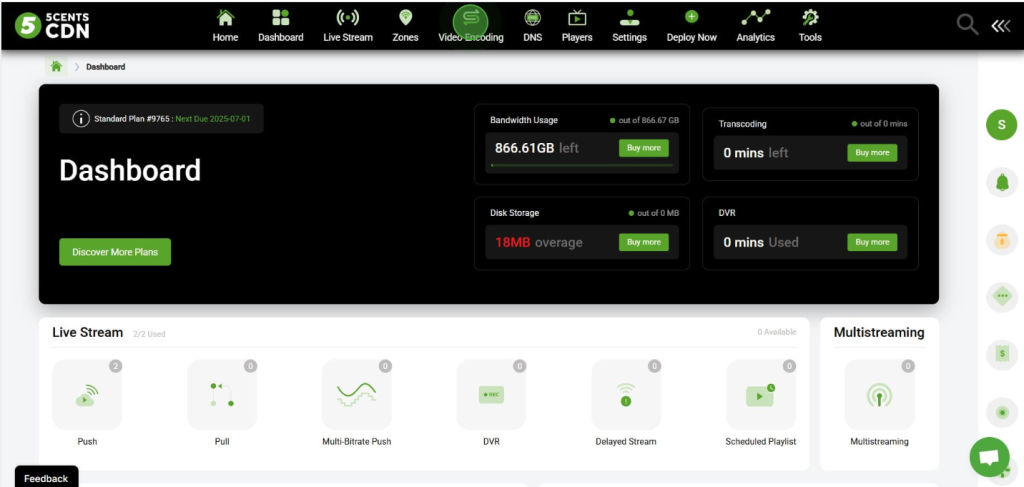
Step 1: Navigate to Video Encoding
- Click on Video Encoding from the main navigation menu.
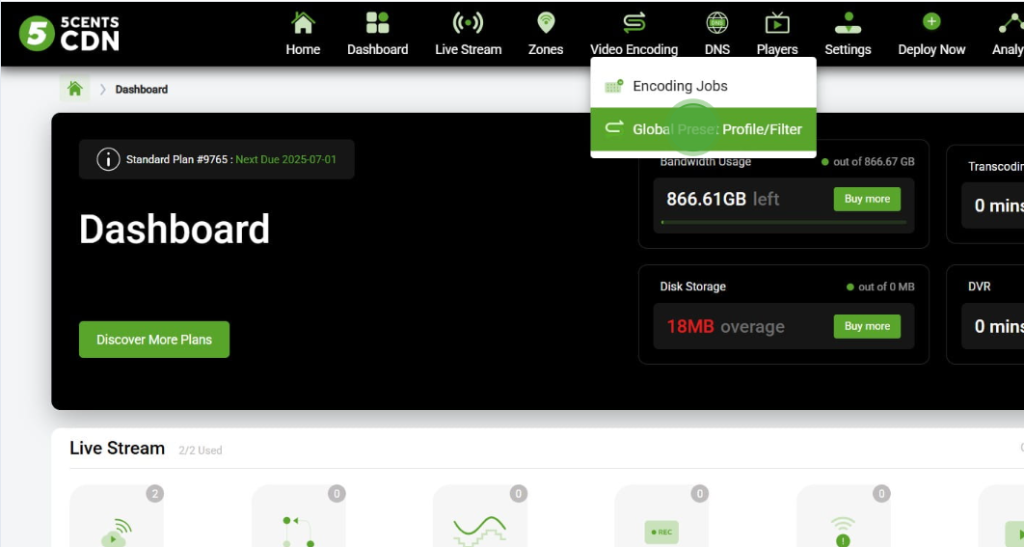
Step 2: Open Global Preset Profile/Filter
- From the dropdown menu, click Global Preset Profile/Filter.
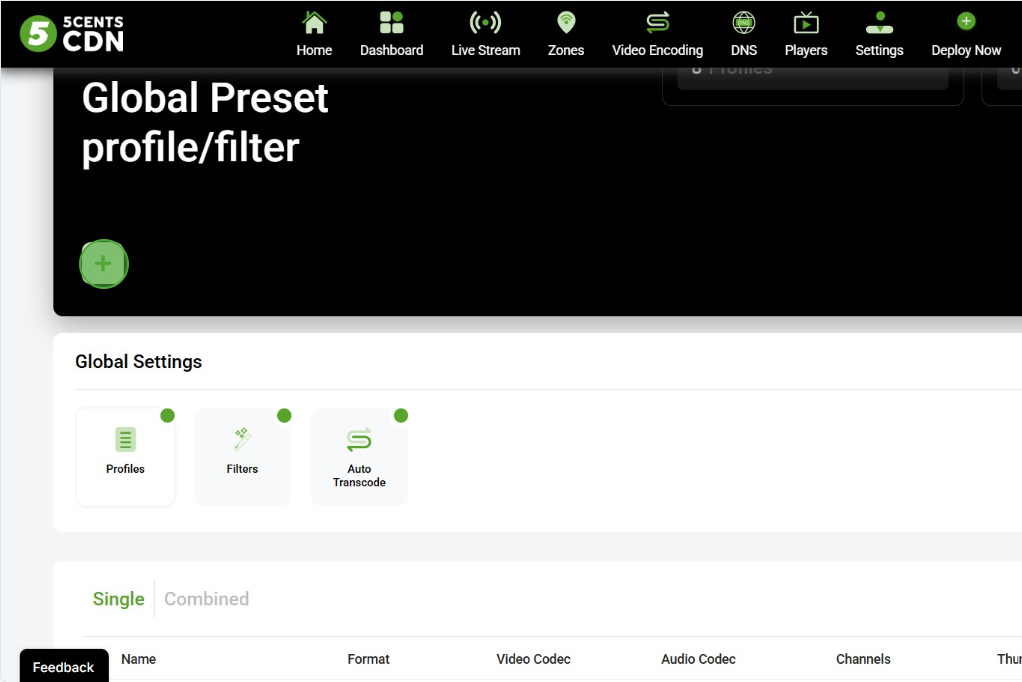
Step 3: Create a New Profile
- Click the + (Plus) button to initiate the creation of a new encoding profile.
Profile Type Selection
Step 4: Choose Profile Type
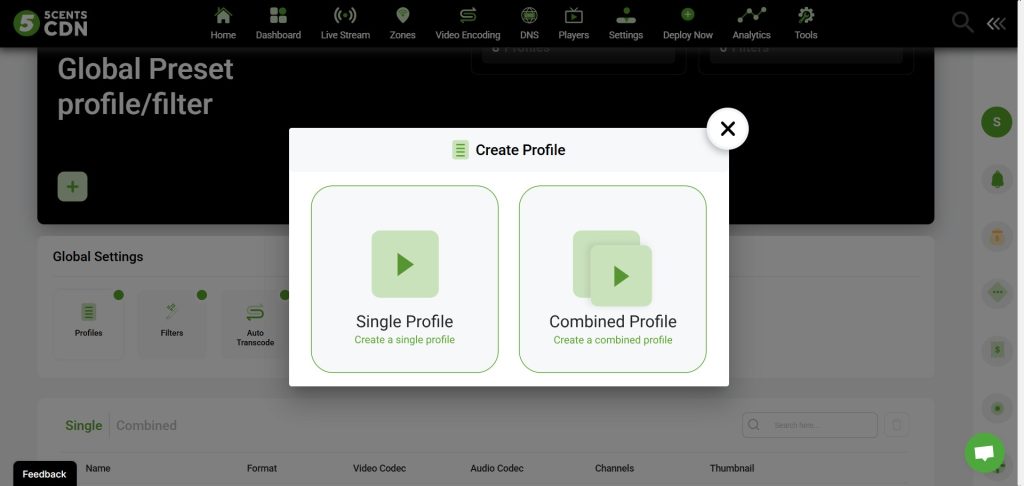
When creating a new profile, a popup will appear with the following two options:
- Single Profile
- Creates one encoding profile with specific, manually defined settings.
- Ideal for generating a single output format or resolution.
- Combined Profile
- Used to create multiple encoding profiles at once.
- Primarily used for ABR (Adaptive Bitrate) streaming, where multiple resolutions and bitrates are needed for dynamic playback based on viewer bandwidth.
- Automatically generates a set of renditions (e.g., 1080p, 720p, 480p) with matching audio and video settings for adaptive streaming.
Select the appropriate option and click Next to proceed.
Basic Settings Configuration
Step 5: Enter Basic Information
- Profile Name: Enter a descriptive name.
- Output Directory: Specify where the encoded files will be stored, default:
mp4
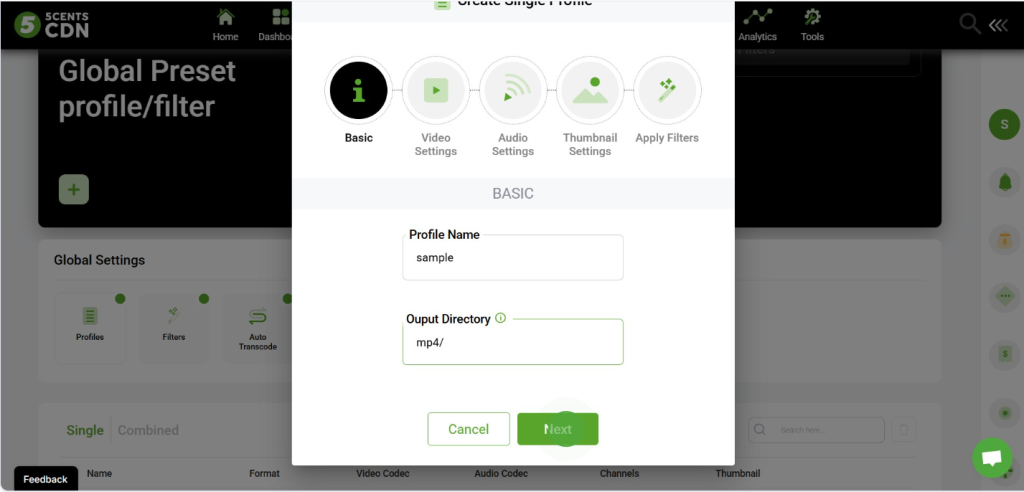
Click Next to proceed to video settings.
Video Settings Configuration
Step 6: Configure Video Parameters
- Container Format:
MP4: Most compatibleWebM: Web-optimizedHLS: Live streamingHLS-AES: Encrypted HLS
- Codec Selection:
H264: Standard, widely supportedH265: Efficient compressionVP9: Open-source alternative
- Resolution:
- Choose from 720p, 1080p, 4K, etc.
- Quality Settings:
- High: Best quality, large size
- Medium: Balanced
- Low: Lower quality, smaller files
- Bitrate:
- Enter in Kbps or select As Defined
Advanced Settings
- Number of Passes:
- One Pass: Faster
- Two Pass: Better optimization
- FPS (Frames Per Second):
- Choose 24, 30, 60, or As Source
- GOP (Group of Pictures):
- 1s to 12s (shorter = better seeking)
- Preset:
- Superfast → Fast (quality-speed tradeoff)
- Video Upscaling:
- Allow or Disallow
- Profile & Level:
- Profile: Main
- Level: 3.0 to 4.2

Click Next to proceed.
Audio Settings Configuration
Step 7: Configure Audio Parameters
- Audio Codec:
- LC-AAC (recommended), MP3, or Opus
- Channels:
- Stereo, Mono, or Custom
- Bitrate:
- Typically 128, 192, 256 Kbps
- Sample Rate:
- 44.1 KHz (CD quality)
- 48 KHz (Professional standard)
- Or custom value

Click Next to continue.
Thumbnail Settings Configuration
Step 8: Configure Thumbnails
- Thumbnail Mode:
- Disabled
- Once
- Interval
- Sprite (thumbnail sheet)
- Interval Settings (if enabled):
- Define interval in seconds (e.g., 30.00s)
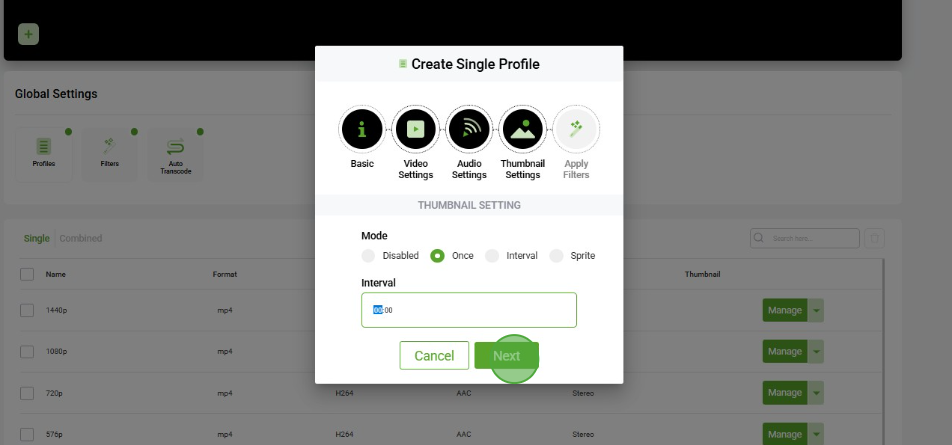
Click Next to apply filters.
Apply Filters (Optional)
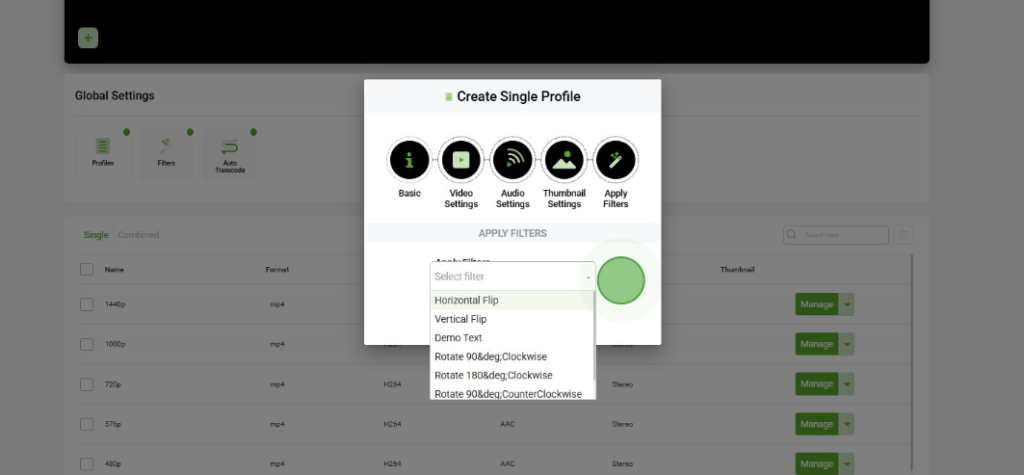
Step 9: Add Filters
Choose optional filters to process the media:
- Video Filters
- Audio Filters
- Custom Filter Chains
Use the dropdown to add and manage filters.
Final Steps
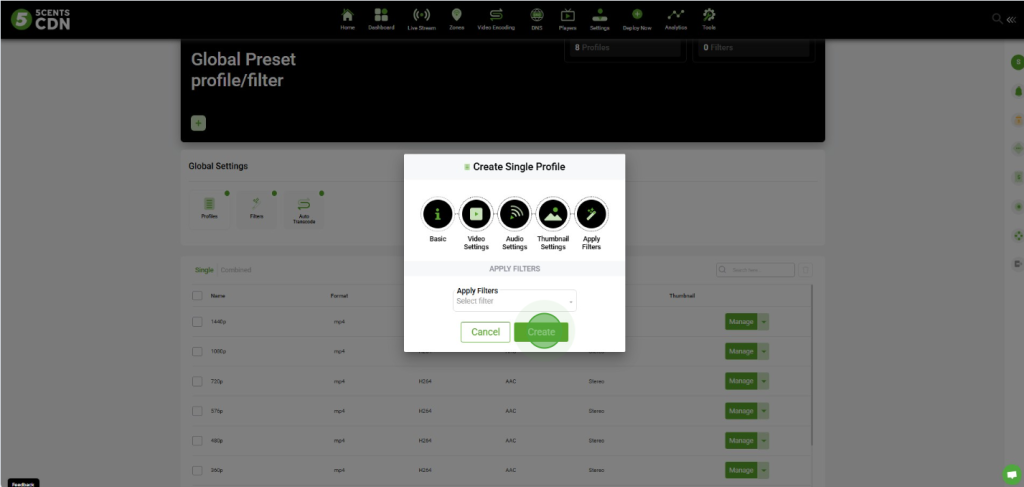
Step 10: Create Profile
- Review all settings
- Click Create to finalize the profile
Key Terms Explained
- GOP (Group of Pictures): Sequence starting with a keyframe followed by predicted frames. Shorter GOPs allow quicker seeking but increase file size.
- FPS (Frames Per Second): Number of frames per second in the video. Higher FPS = smoother video.
- Bitrate: Amount of data processed per second (Kbps). Affects quality and size.
- Codec: Compresses and decompresses video/audio streams (e.g., H264, H265).
- Container Format: File format that stores video, audio, and metadata (e.g., MP4, WebM).
